
Hope your weekend was wonderful and your Monday goes quickly and painlessly!
You probably spent yesterday reviewing the pics from your Saturday of fun; hitting DELETE on more than a few. Ever wonder why you can leave the house looking your best and then when your friends whip out the digi cam your look gets lost in translation??? The fact is that while you may be stunning, have great skin and look just fine in person, most women need a little something to have that translated into photos - look at how much models have to wear for photoshoots! Whether it's a little shine control, a case of face not matching your neck or dark under eye circles; here are a few pointers to put your best face forward:
1- If you have great skin and prefer not to pile on the makeup - carry some shine control powder or those blotters that absorb oil. MAC has blotting powder that comes either in a pressed compact or loose powder. Sephora has a few options for blotting sheets but I like Boscia's Fresh Blotting Linens and they are only $10 while some other brands are near $30.
 2- A lot of foundations have SPF ingredients in them and while that is absolutely essential during the day; at night ... not so much. The thing is that the ingredients that your foundation contain also create what looks like a white film over your face when you take pics. Think of those sunblocks that are really high in SPF and how white and chalky those are. So for night time choose a foundation with no SPF. MAC Cosmetics has Full Coverage Foundation that is actually used by the pros for its opaque coverage and for looking amazing in photographs. Now this may be heavy for some who are not makeup wearers but the end result will be better looking photos!
 [Remember when using heavy foundation never forget blush so that you don't look monotone]
3- Protect ya neck! Even if you use a close matching foundation you should always use some past your jawline and blend into your neck so you don't have this hard line where you foundation ends. You can even brush a little on your decolletage area if you'd like.
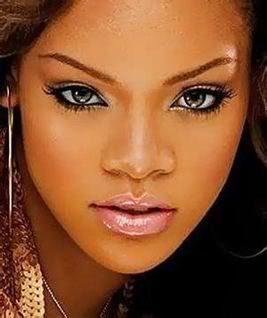
 4- Under eye circles, bags, or even wrinkles can be exaggerated in photos. I never realized that this was an issue until a few months ago when I was in my cousins wedding and the makeup artist piled on the under eye concealer and it looked really light to the naked eye; but in the pictures it looked fabulous. I looked awake and brighter; plus it makes the eye makeup stand out even more. If you have ever seen celebrities or models getting their make up done you always see them with this super light powder under their eyes. Makeup artists use that to catch some of the fall out from dark shadows, liners or mascara flakes but when they brush it out the under eye area is still pretty light. Look at how sexy this cat eye looks; their eyes really pop:
 5- ALWAYS define your eyebrows. If you have none - draw them in. There are are products that have stencils that are natural looking like Anastasia's Classic Stencils. Even if you have well defined brows you should groom them with eyebrow gel so they stay put. Remember: your eyebrows should be a shade darker than your natural hair color (look at Eva Mendes' brow and hair color above.) Most of us have to darken them and define them a bit.
6- And of course: Keep your lip gloss poppin!
 Now you're ready for your close up.
Now you're ready for your close up.;)


No comments:
Post a Comment